
A better board
 My first PCB was not successful, so here is try number two: As you see here, my I wrapped the copper-coated board more closely than before to ensure maximum contact between iron and board as well as supposedly guranteeing a minimum of shifting. So, after repeating the process from before (see previous post for board creation process), I wound up with the following:
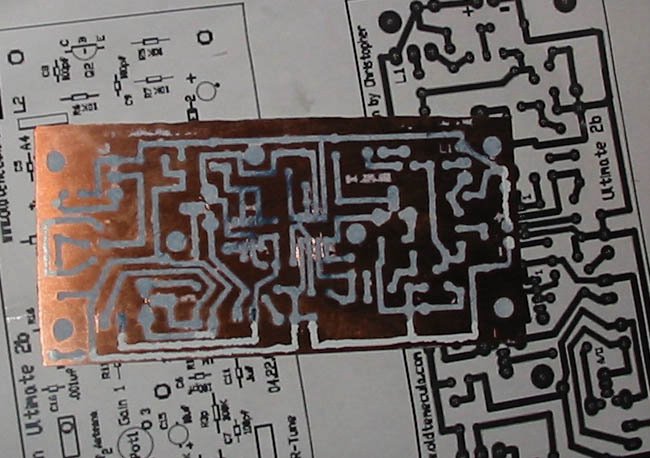 As you can see from the large amount of bright white traces on the bottom, the silkscreen transfer was not very successful on the bottom side of my board. I believe this is due in part to the papers that were wrapped too tightly around the board, because I certainly ironed down on the board hard enough to make a successful transfer. After fixing the weak traces with white-out, I dropped the board into the etchant in this plastic bowl.
It took me 4 hours to completely remove all the copper. It was about 60-65 degrees outsidethat night, and I had the fan on because of the fumes. I would imagine the best place to etch would be outside in 70+ degree weather.
I used small rubber PC motherboard spacers to keep the board off the bottom of my large plastic bowl (picture after etching):
 Next came the drilling, with a 1/32" bit this time. The only place I could find a 1/32" bit was in a little drill-bit set for sale at Home Depot. The 6-piece set was marked and sold specifically for Dremels, so I don't know if I paid too much for them because of that. It was approxiamately $7.50.
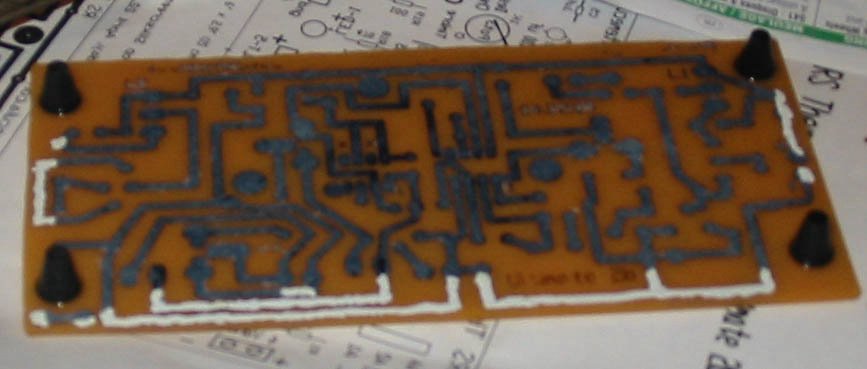
  Finally, after drilling and buffing the excess ink and white-out off the board, the (new and revised!) etching process, was finished!
posted by DanO @ 7:19 PM
![]()
3 Comments:
Hi i am interested in building a theremin too. great job so far!
i have some experience in building guitar effects and now i'm starting to be heavily interested in synths.
I use the glossy photo paper too to mark the traces in my boards before etching. In my experience the "wrapping method" is wrong: the best way to make a clean board is to PREheat the copper BEFORE applying the paper. i usually iron it for 3 or 4 minutes at high temperature before applying the paper.
sry for the bad english (i'm italian :)) marco
Hi Dan,
Do you still have the PCB layout document from the old temecula website. A lot of RS theremin information was removed from the website a few years back, I have contacted Chris but with no reply. any help would be appreciated.
Hi Matt,
Sorry but I do not have the PCB layout document any more. Originally, I did this as a college project, so if I find my old files I should be able to scan and re-upload. Thanks for the interest, and let me know if you have any luck getting them elsewhere!
-Dan
Post a Comment
<< Home